


Painting the room continued today.
The second 1:5 prototype was finished this morning, and despite some slight production problems, it fitted together just fine. This means that I can go to the cutters' later happy that the structure will fit together.
The modelshop uses a laser-cutter that is controlled via Corel and we encountered problems importing the nets as blocks from AutoCAD 2007. These included a random and arbitrary scaling of certain pieces to an unknown and slightly different scale from that set, and the misplacing, mis-alligning or corruption of text produced using the 'annotate' function in AutoCAD. Ray was able to to fix this manually, but it is less than ideal.
The 4mm ply also has a tendency to warp after cutting as it takes on moisture. Robin - the woodshop manager - assures me that this shouldn't be a a problem in the 12mm version as it exhibits grater stability.
The structure is now in four distinct sections - each of which can be mounted individually and is self-supporting. This should aid the tricky operation of attaching the final full-scale structure to the outside wall.
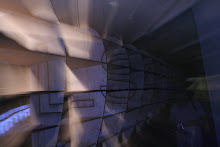
Before setting off for the fabricator's to test full-size pieces, the model was assembled in the studio. We can use the model to test the insertion of various models / drawings / photographs into its 'bays' - and also to serve as an assembly diagram during full-scale production.
At the fabricators (Leicester Laser) we ran some test pieces to check finish quality. The plywood sheets were flat enough to be clamped into position in the cutter and the cut of the laser itself produced a satisfactory finish. There were a few issues with the quality of the 'etch'...but these were sorted out quickly. We were able to increase the distance between the laser and the cutting bed, which in turn increased the width of the cutting beam producing an etch visible from a distance of 4 or 5 metres. Were the plywood shows grain on its face, the laser cuts through pith and resin with differing extent. This resulted in an uneven edge to the etchings. We solved this by increasing the depth to which the laser 'etched' - cutting a channel rather than merely scorching the surface. We were also able to test the tolerance on the slotted joints, which turned out to be pretty tight - ideal for our purposes.
With a satisfactory test obtained the job was left with the fabricators until tomorrow.
No comments:
Post a Comment